Section 3: Deploy Other Server Roles - Mediation server install
Section 3: Deploy Other Server Roles
Mediation server Install
Let’s install the Mediation server now on MGOCSMED01
Step 1: Install Files For Mediation Server.
Step 2: Activate Mediation Server
STEP 3: Manual configuration of mediation server
Mediation server Install
Let’s install the Mediation server now on MGOCSMED01
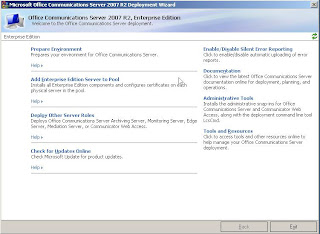
Click on Deploy Other Servers
In here click on Deploy Mediation Server.
Step 1: Install Files For Mediation Server.
In step 1 click on Install.
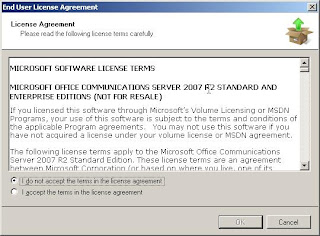
Accept the license agreement and click OK. Select location for install files and click OK.
Step 2: Activate Mediation Server
Click Run beside step 2.
Click Next on splash screen. Use RTCComponentService for service account and click Next. Review settings and click Next.
These warnings OK as we have not enabled logging: Review Log and click Finish.
STEP 3: Manual configuration of mediation server
We now need to configure the settings for the mediation server.
On the R2 console software (Admin tools):
Now at the forest level >> Right Click >> Properties >> Voice Properties
In Location Profiles we ADD
Now we name our location and give it a description:
Now we need to ADD Normalisation rules.
For our first example we simply tell the system that 4 digit extensions should be passed with no changes and are internal to our environment: (this is dependent on your own configuration)
Our second example simply passes the correctly dialled number for national calls to the PBX with no changes:
(Well… technically we had to remove the 0 from the passed number then add it to the regular expression for it to work, we do this as we require a 0 to be dialled for an external number call)
MORE RULES TO FOLLOW
Next we go to phone usage and ADD a usage:
Now we need to add a phone policy, give it a name and description, click OK. Then add policy in next tab and hit Configure to add our new phone usage policy.
Simply configure and add the usage policy we created earlier:
Now under global policy we can select a policy to use as default or set per user. Our example uses a default policy.
Next we click on Routes Tab and ADD:
Now this we will fill in the details for our route to the PBX (We use MX-ONE with latest SP so it is SIP enabled)
Next we configure the mediation server settings.
Right click on mediation server and go to properties:
Select the IP address on mediation server to be used for listening (OCS side) and communications (PBX side) also choose Default Location Profile and click on Next Hop tab. Here select our Pool name in next hop and under PSTN gateway enter the IP address of IPPBX or Gateway. Under Certificate tab select the certificate for mediation server and OK this.
In the QoE tab select our pool and click OK.
Step 4: Configure Certificate
Click Run next to step 4.
On splash screen click Next, Choose Create a new Certificate and click Next. Choose Send Immediately and click Next.
Select the Mediation Server name and click Mark as Exportable and click Next. Fill in Details Next. Subject Name is FQDN of Mediation server and SAN can be empty unless a second domain in play. Click Next.
Fill in regional settings and click Next. Confirm CA and click Next. Click Assign certificate immediately and click Next.
Review settings and click Next. Click Finish when complete.


Comments
Post a Comment