Section 2: Add Enterprise Edition Server to Pool - Step 2: Configure Certificate
Section 2: Add Enterprise Edition Server to Pool
Step 2: Configure Certificate
Once one server is added to pool we can configure a (private) certificate. Click Run to start this process.
Click Next at splash screen, next choose Create a new certificate and click Next, choose Send Request Immediately and click Next.
Ensure your Front-End server is under Name here and then uncheck “Mark as cert as exportable” and click Next, now fill in your details and click Next.
In Subject Name we ensure the FQDN of our front end server pool name. In SAN (Subject Alternative Name) we can select a secondary domain name (e.g. an internal name used) if any used in the org. Click Next and then fill in your geographical information and again click Next.
In choose CA it should populate with your CA name (ours is our DC –MGDC01) click Next. Now review settings and click Next to continue.
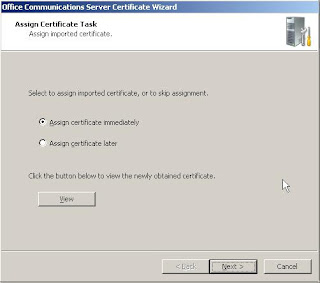
When done we want to assign certificate immediately, you can view the certificate now if you wish. Then click Next.
Review settings here and click Next, now pay note that services will need to be restarted and click Finish.


Comments
Post a Comment